2008年7月6日星期日

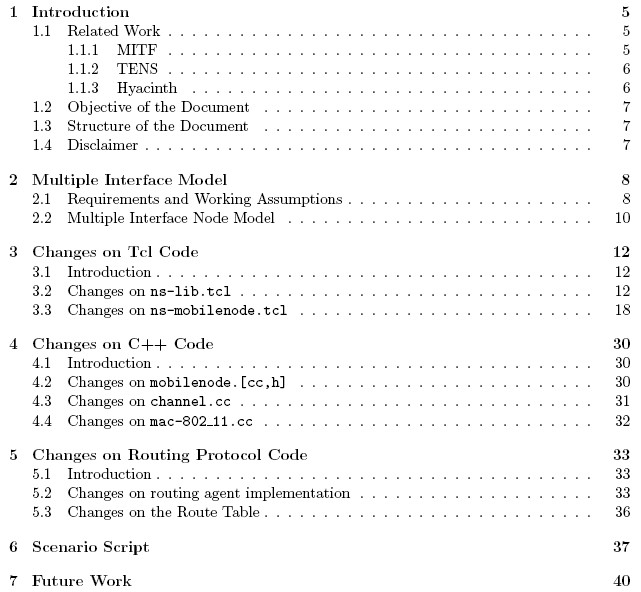
比较多信道多接口ns2扩展: “Aguero.C.R” VS “MW-Node”

I try in this post to sum up and explicit the main differences between
the approach proposed by R.Aguero et al. in their how-to and ours with
the MW-Node. I hope it helps you choosing what better fits your needs.

1) R.Aguero et al., "Adding Multiple Interface Support in NS-2"
(document, http://personales.unican.es/aguerocr)

This document describes changes to enable support of multiple
interfaces. By to support multiple interfaces they mean to allow to have
more than one wireless stack below a single routing agent on a
MobileNode. All the wireless stacks are identical (same Mac/Phy). The
routing agent code has to be modified to handle more than one wireless
stack. This applies only to AODV-like routing agents, that is routing
agents using the standard MobileNode, not the SRNode (DSR) or the
AODVUUNode (AODV-UU) for example.

This functionality is basically what is provided by Hyacinth
(http://www.ecsl.cs.sunysb.edu/multichannel/), some flexibility added.
To this respect their contribution is to me very similar to the
resources available at http://www.cse.msu.edu/~wangbo1/ns2/nshowto8.html

2) Module-based Wireless Node (MW-Node patch + documentation,
http://www.q2s.ntnu.no/~paquerea/ns.html)

In the following, I focus on the main features of the MW-Node. For
implementation details and design choices please refer to the documentation.

A MW-Node is a standard Node (not a MobileNode) with capabilities -
wireless, mobility, (energy support, not functional yet) - added by
means of modules.

The purpose of this new design of wireless and mobile networking support
in ns2 is twofold:
- to support new features such as multiple channels/multiple interfaces, and
- to provide a common basis for implementation of any wireless routing
protocol instead of having each routing protocol as a particular case
(not to say a particular node object) as it is with the MobileNode.

We distinguish between:
- multiple channels: one single routing object handling several wireless
interfaces possibly on different channels, and
- multiple interfaces: several interfaces, possibly of different types
(e.g different Mac/Phy), with one routing object handling one interface.

Following these definitions, R.Aguero et al. how-to discusses multiple
channels support only, not multiple interfaces support. The MW-Node
supports both.
Note that routing agents cannot be used directly with the MW-Node, even
in the case of a node with a single interface, and need to be converted.
Some guidelines are provided in the documentation.

Also, the layout of the MW-Node differs from the layout of a standard
MobileNode and therefore from the layout proposed by R.Aguero et al.
In the MW-Node, the routing object lies before the address classifier.
This is to enforce that data packets pass through the routing object.
This is not the case with a standard MobileNode at the destination or at
a portal (wired-wireless) node.

Finally, a new network interface object is provided and enables:
- per interface operation control (e.g. bring up/down one of two
interfaces only)
- better wired/wireless integration.

Regards,

Laurent Paquereau
Q2S Centre of Excellence, NTNU

转自:

http://mailman.isi.edu/pipermail/ns-users/2007-February/058759.html

......

[Read More...]

Aguero.C.R’s “Adding Multiple Interface Support in NS-2″

这个也是一个叫Aguero Ramon开发的多接口多信道的ns2扩展.十分不错.详细信息在pdf里:

we propose a set of changes to be done, so as to be able to use devices having multiple interfaces within the ns-2 framework. These changes and modifications are summarized in the howto “Adding Multiple Interface Support in NS-2″, which you can download from the following link.

PDF:

http://personales.unican.es/aguerocr/files/ucMultiIfacesSupport.pdf

转自:

http://personales.unican.es/aguerocr/

......

[Read More...]

“MW-Node” path for ns2 to support multiple interfaces & multiple channels

一个我最开始选用的multi-interface的扩展,不过貌似不是特别好用,现在转移用hyacinth了…XD….如下:

MW-Node patch for ns-2

A Module-based Wireless Node (MW-Node) is a Node with wireless and mobile capabilities added by means of modules. It is not a new node object derived from Node. Rather it is a new layout of mostly existing components. Rationale for this new design has been presented in [1]. The MW-Node provides a flexible support for wireless and mobile networking and in particular:

* support for multiple interfaces/multiple channels, and
* a common basis for the implementation of wireless routing protocols.

Download

Get the latest patch for ns-2.30 (patch for ns-2.29.3). Log. RSS

Install

Move to ns-2.30 directory.

If you have already installed ns run

make distclean

Patch the code and reinstall ns

patch -p1 < ns-2.30-mwnode-20070301.patch
./configure
make
chmod u+x tcl/test/test-all-mwnode

To validate the installation run

./validate

Documentation

Documentation is available in doc/mwnode.

Doxygen documentation can be generated locally by running doxygen in doc/mwnode.

Example scenario

An example scenario (mwnode-ex.tcl) is provided in tcl/ex. To run the simulation, move to tcl/ex and run

ns mwnode-ex.tcl

Reference

[1] Laurent Paquereau and Bjarne E. Helvik, “A module-based wireless node for ns-2″, in Proceedings of the first Workshop on NS2: the IP network simulator (WNS2), Pisa, Italy, 2006. [doi] (request copy)

......

[Read More...]

802.11b in NS2

本文稍微大概介绍了一下ns2里的802.11b…

Making NS-2 simulate an 802.11b link
Joshua Robinson jpr -at- rice.edu

For a research project I worked on in 2004 (resulting paper here), I used two Netgear MA311 cards to create a simple ad hoc connection. These cards are 802.11b PCI cards, stuck in the back of brand new dell workstations. I did some simple throughput tests using netperf, and found that my results differed significantly from what NS told me.

So I set about to figure out why things were different and what needed to be done to sync the results. I’ll quickly explain my findings as it wasn’t a complex process. Skip to here if you want to see my actual results.

First, I’m assuming version 2.27 or newer here. If you’re using older versions, some things will be different and I’ll try to point them out if I can.

Data Rate
NS, by default, has the data rate for the MAC set at 2 Mbps. But cards are faster now. My cards are 802.11b, which means they’re 11 Mbps, and so we need to change this. Add the following to the beginning of your simulation script:
Mac/802_11 set dataRate_ 11Mb

The card can send at 1, 2, 5.5, or 11 Mbps. Most cards support some kind of ARF (Auto-Rate Fallback) for automatic rate selection between these choices. ARF basically seems to be a slow-timescale feedback mechanism. If there are a lot of packet errors, ARF will step down the rate, and conversely, if there are no errors then the rate will be increased. I’m not explaining this in detail because NS doesn’t support any multi-rate functionality by default. That means mobile nodes will always send their packets at dataRate_. So if you really want to be realistic, you need to support this somehow. I didn’t.

RTS Threshold
Almost all commercial 802.11b cards have the RTS/CTS exchange turned off by default. This is not a bad decision since I think most people’s home wlan networks are simple enough so that the RTS/CTS really is just unnecessary overhead. NS by default has this feature turned on, so we probably want to tell NS not to use this feature. Add this line to the beginning of your script:
Mac/802_11 set RTSThreshold_ 3000

This means that an RTS will only be sent for packets that are bigger than 3000 bytes, which should be never. Note: if you want RTS/CTS on, then set this value to zero.

Preamble
I think this is probably the least obvious modification so I’ll try to be a little more detailed. Every packet is sent with a preamble, which is just a known pattern of bits at the beginning of the packet so that the receiver can sync up and be ready for the real data. This preamble must be sent at the basic rate (1 Mbps), according to the official standard. But there are two different kinds of preambles, short and long - referring to the length of the sync field. The long preamble has a field size of 128 bits, while the short preamble is only 56 bits. I would guess this short preamble option came about as hardware progressed and transceivers got better at locking on to a signal. NS is set by default to use the long preamble. My cards use the short preamble by default, and unfortunately, I don’t know a good way to determine if your card is using long or short preambles. Email me if you have any ideas.

To support short preambles in NS, add the following line at the beginning of your script:
Mac/802_11 set PreambleLength_ 72
Note: there are 16 other bits in the preamble that aren’t affected by the short/long distinction. To go back to long, change this value to 144.

The Channel
Above is everything you need to simulate an 802.11b card accurately (at least more accurately than the default NS does), but there’s still a big assumption in NS - that’s the wireless channel model. Currently the received power of a packet only depends on the distance between sender and receiver. But in real life, there are a lot of other factors influencing received power. And if you want a realistic simulation, you need to simulate this. I would suggest going here to find out more information about a more realistic channel fading model.

Packet Size
There is a slightly annoying default setting in many versions of ns that makes your packet size not what you think it is. The default setting is this:
Agent/UDP set packetSize_ 1000
Which means that if you try to set your UDP packet size to greater than this, it will actually split up each packet into two smaller ones. You really want this line:
Agent/UDP set packetSize_ 1500
If you are not sure if this is a problem, I would recommend checking the packet sizes in your trace file. If you see the wrong packet sizes, this is most likely the problem.

Results
The table below shows achieved UDP throughput in Mbps.

Packet Size (Bytes)

Simulation
RTS off
Experimental
RTS off
Simulation
RTS on
Experimental
RTS on

128

1.28

1.2

0.75

0.76

256

2.03

2.08

1.4

1.42

512

3.67

3.58

2.48

2.5

1024

5.49

5.38

4.03

4.05

1440

6.41

6.35

4.93

4.96


As you can see, the simulation results are very close to the real results I obtained. In fact, I believe that they are close enough so that the difference can be entirely accounted for by the randomness of the CSMA MAC.

Please send me any comments/questions/corrections. Thanks.


转自:

http://www.ece.rice.edu/~jpr/ns/docs/ns-802_11b.html#Results

......

[Read More...]

很有用的ns2的相关处理工具

1. 分析Trace

NANS
- Network Analyzer for Network Simulator ns2
--By Java
http://www.geocities.com/ankurjain009/projects.htm
NANS is the utility which brings all these features into one and from now on wards, strives to eliminate all the problem associated with it.


TRACEGRAPH - Network Simulator NS-2 trace files analyzer
--By Matlab
http://www.geocities.com/tracegraph/
Trace graph is a free network trace files analyzer developed for network simulator ns-2 trace processing. Trace graph can support any trace format if converted to its own or ns-2 trace format. Trace graph runs under Windows, Linux, UNIX and MAC OS systems. Trace converter processes traces over 80x faster and is available to buy.


jTrana
--By Java & MySQL

https://sourceforge.net/projects/jtrana/
Jtrana is a Java-based NS-2 wireless simulation trace analyzer. Its input is an NS2 wireless trace, and its output is a graph or data-set that can be plottedwith other tools such as Gnuplot.Any problem, plz visit:http://ns2trana.googlepages.com
It's from Weiwei's Study (http://hi.baidu.com/vvfang).


2. 场景制作辅助

NSG2
--By Java
http://wushoupong.googlepages.com/nsg
NS2 Scenarios Generator 2(NSG2) is a JAVA based ns2 scenarios generator. Since NSG2 is written by JAVA language, you can run NSG on any platform. NSG2 is capable of generating both wired and wireless TCL scripts for ns2. This tool provides wireless node function. Below this does not have.


NS WorkBench - Graphical User Interface For Network Simulator
--By Java
http://www.mnlab.cs.depaul.edu/projects/nsbench/
nsBench makes NS-2 simulation development and analysis faster and easier for students and researchers without losing the flexibility or expressiveness gained by writing a script.


(待续...)

......

[Read More...]

TeNS:The Enhanced Network Simulator (TeNs), for multi-interface implementation

TeNS是另一个支持多信道多接口的NS2的扩展.比Hyacinth的扩展性要强,自由度高.但是貌似支持的ns2版本太老了...用在ns-allinone-2.1b9a-gcc32... -_-"

Features in TENS 1.2

  • Multiple interface support added

  • Static Routing implemented for wireless nodes

  • Co Channel interference added

  • Adaptive data rate support for 802.11

  • BPSK Modulation Scheme Added

  • Directional Antenna support added (More radiation pattern added in TENS1.2)

  • Channel Number made configurable

  • Addition of ARP entries through script

  • 2-p protocol for point to point link added

  • Several MAC parameters like RTS Threshold, Capture threshold made configurable.


Tutorial

In this section we provide a quick tutorial on the new feature additions and their usage. Please note that this tutorial assumes that the reader is fairly acquainted with NS-2. Extensive NS-2 tutorials can be found at the following links:


4.1 Configuring Network Components

4.2 Main Program

4.3 Configuration Of Nodes

4.3.1 Setting up Multiple interfaces

4.3.2 Attaching a directional antenna

4.3.3 Setting the Transmit Power

4.3.4 Channel Number Setting

4.3.5 Capture Threshold Setting

4.3.6 Carrier Sense Threshold Setting

4.3.7 Rx Threshold Setting

4.3.8 Modulation Scheme Settings

4.3.9 Frequency settings and Loss factor

4.4 Adding Static Routes

4.5 Setting up parameters for MAC

4.6 Adding ARP entries

4.7 Using the 2P Iimplementation

4.7.1 Link Layer Configurations

4.7.2 MAC Layer Configurations

转自
http://www.cse.iitk.ac.in/users/braman/tens/#Tutorial
......

[Read More...]

Measure acket loss rate, jitter, and end-to-end delay for UDP-based applications

Two methods will be presented. One is to parse the traffic trace file by using gawk, and the other is to insert some codes in C++ codes. The first method is easy when the simulation is only on wired network topology. When the simulation covers wireless part, using gawk to parse traffic trace file becomes hard. Because the trace format for wireless is not the same. However, the second method needs some efforts before using it. But if the work is done, it will be easy for you to get these metrics despite wireless or wired simulation scenarios.

Method.1 Parsing the trace file (skipped)

Method.2 Modify and add mudp&mudpsink


The basic idea is to insert two fields, sendtime_ and pkt_id_, in the hdr_cmn header. When packets are sent, the packet id and send time is recorded in the sender trace file. Then when packets are received at the destination, the packet id and receiving time is recorded in the receiver trace file. So I prepare two agents, mudp and mudpsink to do the jobs. Mudp is the extension of udp agent. It only overrides the sendmsg function to keep download the packet id and sendtime in the user specified file.

[Insert the codes into NS2]

1.Download mudp.cc, mudp.h, mudpsink.cc, and mudpsink.h.
2.Create a folder named measure under ns. (for example, ~/ns-allinone-2.28/ns-2.28/measure)
3.Put these four files into measure folder.
4.Add sendtime_, pkt_id_ into packet common header. (modify common/packet.h)

struct hdr_cmn {
enum dir_t { DOWN= -1, NONE= 0, UP= 1 };
packet_t ptype_; // packet type (see above)
int size_; // simulated packet size
int uid_; // unique id
int error_; // error flag
int errbitcnt_; // # of corrupted bits jahn
int fecsize_;
double ts_; // timestamp: for q-delay measurement
int iface_; // receiving interface (label)
dir_t direction_; // direction: 0=none, 1=up, -1=down
double sendtime_; ...
unsigned long int pkt_id_;
...
inline int& addr_type() { return (addr_type_); }
inline int& num_forwards() { return (num_forwards_); }
inline int& opt_num_forwards() { return (opt_num_forwards_); }
//monarch_end
inline double& sendtime() { return (sendtime_); } // added by smallko
}

5.Add the “measure/mudp.o measure/mudpsink.o “ in the OBJ_CC of Makefile.
6.Add “Agent/mUDP set packetSize_ 1000” in the ns-default.tcl. (ns-default.tcl is under ~/ns-allinone-2.28/ns-2.28/tcl/lib)
7.make clean ; make

Then in tcl file:

...
#Setup a mUDP connection
set udp [new Agent/mUDP]
#set the sender trace file name (sd)
$udp set_filename sd
$ns attach-agent $n1 $udp
set null [new Agent/mUdpSink]
#set the receiver trace file name (rd)
$null set_filename rd
$ns attach-agent $n3 $null
$ns connect $udp $null
$udp set fid_ 2

#Setup a CBR over UDP connection
set cbr [new Application/Traffic/CBR]
$cbr attach-agent $udp
$cbr set type_ CBR
$cbr set packet_size_ 1000
$cbr set rate_ 1mb
$cbr set random_ false
...

After running, you will get sd and rd.

(sd)

0 0.100000
1 0.108000
2 0.116000
3 0.124000

……………………………….

The first column: packet id ; the second column: packet send time

(rd)

0 0.100000 0.138706 0.038706
1 0.108000 0.146706 0.038706
2 0.116000 0.154706 0.038706

……………………………………………………………………………

The first column: packet id ; the second column: packet send time; the third column: packet receiving time; the fourth column: end-to-end delay.


转自
http://140.116.72.80/~smallko/ns2/tool_en.htm

补充:还有另外2个连接讲述类似诶内容,统计相关数据的
http://hpds.ee.ncku.edu.tw/~smallko/ns2/wireless-udp-1.htm 针对udp
http://140.116.72.80/~smallko/ns2/tool.htm (中文)针对用awk来统计ns2的trace各类数据以及制图
......

[Read More...]

Propagation Threshold calculation

在ns-2.29/indep-utils/propagation/threshold.cc內可以得知,FreeSpace與TwoRayGround兩種model計算Pr的方式:

double TwoRay(double Pt, double Gt, double Gr, double ht, double hr, double L, double d, double lambda)
{
/*
* if d <>= crossover_dist, use two ray model
*
* Two-ray ground reflection model.
*
* Pt * Gt * Gr * (ht^2 * hr^2)
* Pr = ----------------------------
* d^4 * L
*
* The original equation in Rappaport's book assumes L = 1.
* To be consistant with the free space equation, L is added here.
*/

double Pr; // received power
double crossover_dist = (4 * M_PI * ht * hr) / lambda;

if (d < pr =" Friis(Pt," pr =" Pt">

Pr:在程式中即為RXThresh_也就是要在tcl所設定的數值
Pt = transmit power
Gt = transmit antenna gain
Gr = receive antenna gain
ht = transmit antenna height
hr = receive antenna height
d = distance (例如250m)

根據網路上鎖參考的資料,我們可以透過編譯threshold.cc來產生一個執行檔,再經由輸入相對應的參數至所產生的執行檔,即可得到RXThresh_,以下敘述如何產生出RXThresh_:

Step1.
ns-2.29/indep-utils/propagation/ 執行以下的編譯指令:
$g++ threshold.cc -o calculate

Step2.
若要執行計算某distance其相對應的RXThresh_,則執行以下指令:

$./calculate -m TwoRayGround -fr 3.5e+9 250

(計算model為TwoRayGround,且frequency為3.5MHz,距離250M)
如此即可計算出RXThresh_ .
......

[Read More...]

NS2里的CSThresh,RXThresh,Pr等等的意义...

学习802.11的载波侦听机制,其实最重要的是了解 Physical Carrier Sense和Virtual Carrier Sense的不同,另外,NS-2里如何控制一个包能不能被接收到,能不能产生干扰的机制,也就是那几个关键的控制数值,如 CSThresh,RXThresh,Pr等等。这里解释一下:

1. 如果Pr < CSThresh,那么无线网络接口将这个信号作为噪声而丢弃。
因此,MAC 层不能检测到这个载波。或者说,对于MAC 层而言,这个信
号是不存在的。
2. 如果CSThresh < Pr < RXThresh,无线网络接口将这个信号标记为错
误信号,然后上传给MAC 层进行处理。对于MAC 层而言,该信号可以
被检测到,但是不能被正确地解码。因此,MAC 层将该信号视为一个干
扰噪声。
3. 如果Pr > RXThresh,无线网络接口直接将该信号上传给MAC 层。此
时, MAC 层可以对该信号进行正确地解码,并进行相应地处理。

在NS-2 仿真软件中,干扰范围的半径约为发射范围半径的2.2 倍。

转自
http://hi.baidu.com/vvfang/blog/item/bf834c0fc3b4ab296159f344.html
......

[Read More...]

NS-MIRACLE: Multi-InteRfAce Cross-Layer Extension library for the NS2

一个Multi-Interface的扩展,没用过,回头用用看 ; )

Overview


NS-MIRACLE is a set of libraries designed to enhance the functionalities provided by the Network Simulator ns2. It provides an efficient and embedded engine for handling cross-layer messages and, at the same time, enables the co-existance of multiple modules within each layer of the protocol stack. For instance, multiple IP, link layers, MACs or physical layers can be specified and used within the same node. The NS-MIRACLE framework facilitates the implementation and the simulation of modern communication systems in ns2; moreover, due to its modularity, the code will be portable, re-usable and extensible. (Download)

Installation

For step-by-step installation instructions, you can refer to the nsmiracle-dei80211mr tutorial.

Documentation

A detailed documentation of ns-miracle is available. Please note that this documentation was written for a preliminary release of ns-miracle, and is therefore somehow outdated.

You can find the documentation here.

In this release, in addition to MIRACLE library, it is included a set of libraries to simulate wireless system networks, in detail:
  • Traffic generators
  • TCP Agents
  • IP modules
  • IEEE802.11 (both the one from standard ns distribution and Multirate [2])
  • MPhy, a general physical layer module in which interference of
  • in-flight packets is evaluated using a Gaussian Model, and an enhanced
  • propagation model is provided (fading with Jakes Simulator, shadowing
  • with Gudmonson model and path loss with Hata model)
  • UMTS:
    • Link layer is derived from eurane extension [3]
    • Physical layer is develpoed exteding Mphy
    • Link and Wireless Channel
    • physical mobility models (standard and Gauss Markov mobility model)
转自
http://www.dei.unipd.it/wdyn/?IDsezione=3965
......

[Read More...]